A dismasted yacht in the Coral Sea is not a sailing problem. It is a rescue problem. The aluminium extrusion running from mast step to masthead is the structural backbone of the boat, and its failure typically ends a passage without warning and without recovery. Yet most pre-departure rig checks concentrate on the wires, pins, and swages - the rigging system - and treat the spar itself as background. This guide addresses that gap. It covers the aluminium extrusion and the boom as structural components in their own right, with the specific inspection tasks that apply to boats preparing to depart Cairns for Papua New Guinea, Indonesia, the Torres Strait, or the Coral Sea passages beyond.
Why the Spar Is a Separate Inspection Task
Standing rigging inspections check wire diameter, swage integrity, and toggle alignment. Running rigging inspections cover halyards, sheets, and block condition. Neither task examines the aluminium extrusion itself - its wall thickness, the state of its anodizing as a corrosion barrier, the structural integrity of welded castings at the gooseneck and spreader roots, or the condition of the internal load-bearing fittings. Those are spar inspection tasks, and they require different tools and a different focus.
Spar failure is typically sudden and total. A worn shroud gives you a slackening wire before it parts; you notice, ease the sail, and deal with it. Aluminium hollowed out behind a spreader bracket by galvanic corrosion gives no visible warning until the section buckles under load. The same is true of a gooseneck that cracks at a weld toe on a night gybe in 25 knots. Catching these problems in flat-water Cairns Harbour is the entire point of this inspection.
There is also a practical documentation requirement. Many offshore insurance underwriters now require written evidence of a professional rig inspection - including aloft work, not a deck-level visual check only - before issuing an offshore cruising endorsement. Without that documentation, a dismasting claim can be denied. The industry consensus inspection interval is every three years; after ten years of service, mast tangs, spreader brackets, and standing rigging are commonly replaced regardless of visible condition. If you cannot produce paperwork showing when your last professional inspection was conducted, treat the interval as expired before you clear Cairns.
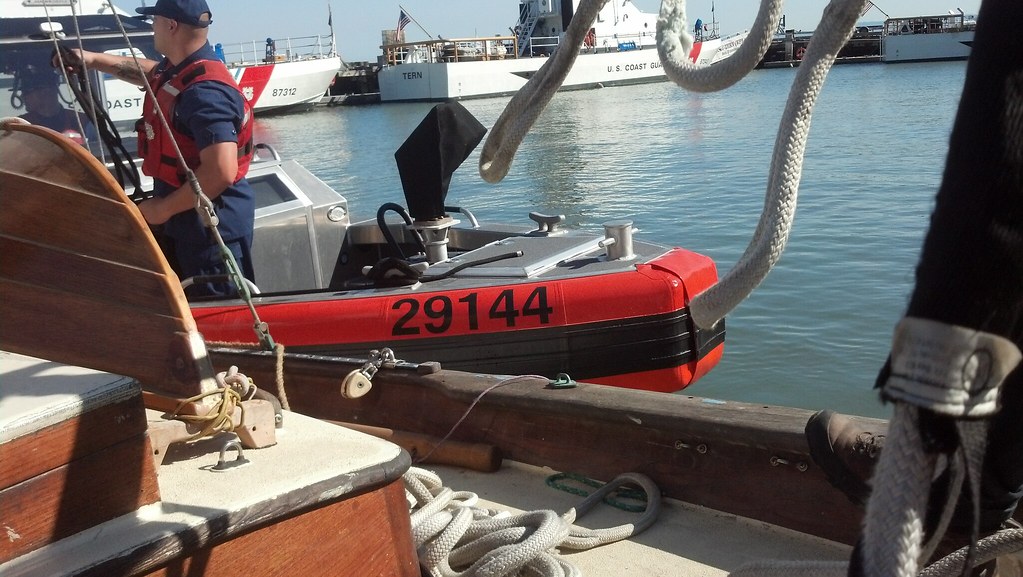
Deck-Level Inspection Before Going Aloft
Work methodically from the mast base upward before committing anyone aloft. The base reveals different problems depending on whether the mast is keel-stepped or deck-stepped.
Keel-Stepped Masts
The heel casting sits in the bilge. Every time the bilge holds water - from rain, a leaking fitting, or condensation - the heel and the base of the extrusion are in a corrosive environment. Check that drain holes in the heel casting are clear; blocked drains pool water in the casting and the corrosion starts there. Run your fingers around the back of the casting where you cannot look directly: pitting and white oxide powder are common on the hidden face. Inspect the aluminium above the heel pin for material loss.
Deck-Stepped Masts
The failure point shifts to the deck collar. A leaking deck boot allows water to track internally down the inside of the extrusion, setting up corrosion that is invisible from deck level. Press the rubber boot firmly around its full circumference and check for brittleness, cracking, or separation from the mast section. UV-hardened rubber has lost its seal.
Gooseneck and Mast Track
The gooseneck pivot endures dynamic shock loading on every gybe and reef. Grip the boom and apply firm lateral pressure. Roughly 1 to 2 mm of side-to-side slop in the pivot joint means the pin and its bore are worn and load is concentrating at small contact points - these joints fail under shock loading offshore. Check all visible weld toes around the gooseneck casting for surface cracking; low-angle morning light casts shadows that reveal fine cracks clearly. Walk the mast track and run your fingers along the channel. Bent sliders, burrs in the track, and loose rivets are cheap to fix on the dock and cause real handling problems during an offshore reef.
Going Aloft in Cairns
Cairns Harbour offers calm, flat water inside the marina on most mornings, and a working marine service community within walking distance of most berths. The argument for doing aloft work before departure is straightforward: going aloft in a seaway to deal with a problem that should have been caught at the dock significantly increases risk for the crew member sent up, and any repair done hanging from a bosun's chair in a swell is compromised before it starts.
For inspection and light work - replacing a connector, photographing fittings, cleaning a sheave - a bosun's chair on the main halyard is adequate. For heavier work requiring both hands free, such as replacing a sheave axle or refitting a tang, a crane lift on a platform is safer and more practical. Most Cairns riggers can arrange this through the marina travel hoist or a mobile crane operator.
- Inspect the main halyard sheave and axle pin before trusting the halyard to lift you - if the sheave is the problem you need a different method of ascent.
- Rig a separate safety line on a secondary halyard with a prussik loop that the person aloft advances as they climb.
- Brief the person tailing on deck: steady tension, no sudden drops, and an immediate lock on the instruction "hold".
- Carry a handheld VHF or phone aloft; the person below cannot reliably hear instructions over wind noise.
- Start the inspection at the masthead and work downward so you do not have to re-hoist to check something missed above.

Masthead Inspection
The masthead concentrates more potential failure points per square metre than any other section of the spar. Work methodically around its full circumference.
Sheaves and Tang Fittings
Stainless-steel wire halyards running over aluminium sheaves cut groove channels into the softer material over time. Run your thumbnail around the groove: a sharp-edged channel means the sheave acts as a knife edge under load. A halyard under shock load - a squall, an accidental gybe, a spinnaker wrap - will sever at a knife-edged sheave groove. This is a documented cause of masthead loss and is only visible from aloft. Replace worn sheaves before departure and confirm that axle pins have their keepers present and undamaged.
The forestay and backstay tang fittings at the masthead take the full rig loads. The galvanic potential difference between stainless steel and an aluminium mast extrusion is typically between 0.5 and 1.0 volts depending on alloy grade - large enough to drive accelerated corrosion wherever the two metals contact in the presence of seawater. The aluminium around fasteners hollows out invisibly behind the fitting surface. Press hard on each tang and look for any movement relative to the section. Rust staining on the aluminium below the fitting, white powder at fastener heads, or any movement in the fitting means the section behind has been compromised and the fitting must come off for full assessment.
Masthead Electronics and Instruments
- VHF antenna coax connector: inspect for corrosion and physical integrity; a corroded connector reduces antenna efficiency and is straightforward to replace at the dock.
- Steaming light and tricolor: function-test both at the masthead - the ARC technical inspection and the Ocean Racing Club of Victoria's offshore standards both require positive function tests of all masthead navigation lights before departure.
- Wind instrument transducer housing: check for cracking and confirm all fasteners are tight; a loose housing at sea destroys the transducer and leaves you without apparent wind data.
- Backstay insulators if fitted: inspect for cracking or tracking marks that indicate electrical breakdown.
Spreader Inspection
Spreader roots are among the most frequently cited failure points found during pre-passage inspections, and the signs are consistent if you know what to look for.
- White oxidation powder at the base of a spreader bracket: aluminium oxide, the product of active galvanic corrosion eating the section behind the fitting.
- Paint or anodizing lifting around the bracket perimeter: moisture has entered and corrosion is active under the surface.
- Rust staining on the mast section below a fitting: iron oxide from a corroding stainless fastener tracking down the extrusion face.
- Any movement in the bracket when firm hand pressure is applied against the fitting.
Any of these signs means the bracket needs to come off so the aluminium behind it can be assessed directly. What looks like surface discolouration on the outside is frequently significant material loss on the interior face of the mast wall. On an intermediate spreader rig, check cap and intermediate brackets independently; they carry different compression loads.
Spreader tips need their end caps present, undamaged, and fitted with adequate chafe patches for the genoa sheets. A missing end cap is a sail problem. A loose one that allows water into the spreader tube is a corrosion problem that develops silently over a passage.
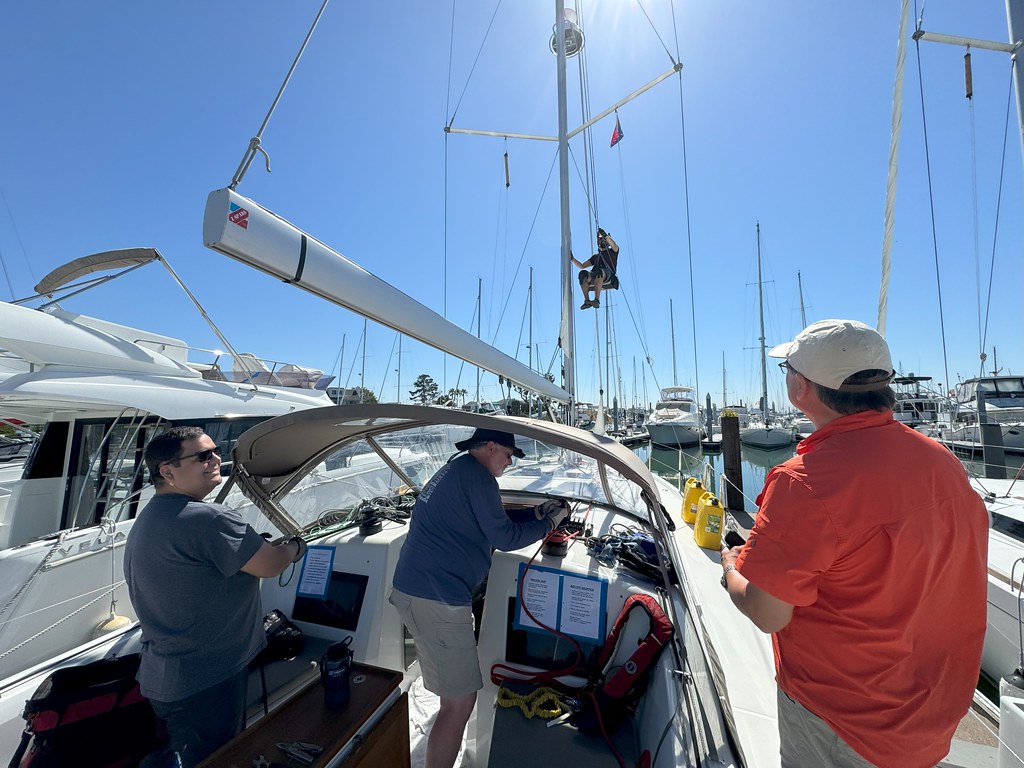
Boom Inspection
The boom takes gybing shock, reef loads, vang tension, and mainsheet loads, all concentrated at a small number of fittings on a relatively thin aluminium section.
Gooseneck and Reefing System
Having checked the pivot pin from deck, now inspect the outboard face of the gooseneck casting for surface cracking at weld toes. Reefing sheaves inside the boom and at the tack fitting take sustained load at every reef; confirm that sheave bearings turn freely and that tack padeyes are not pulling away from the boom wall.
Vang, Mainsheet, and End Fittings
Vang and mainsheet bail fittings are load-concentrating points where through-bolts pass through thin aluminium wall. Corrosion beneath stainless fasteners reduces wall thickness at exactly these high-stress locations. Check every through-bolt for backing plates or oversized washers on the inside of the extrusion; missing backing hardware concentrates load at an already-thinned section. The boom end cap carries topping lift and outhaul loads - confirm it is fully seated, that the outhaul sheave turns freely, and that the topping lift attachment is undamaged and secured. A boom end cap that parts offshore creates a flailing spar that can injure crew.
Internal Mast Wiring
Most production mast wiring - VHF antenna coax, steaming light, tricolor, wind instrument cables - runs without conduit, resting directly against the interior wall of the extrusion. The mast flexes continuously at sea; on a long offshore passage that flex runs for days. Every exit hole for a wire is a chafe point.
Pull the wiring bundle at the mast base and work each cable individually, looking for:
- Abraded or split insulation at or just above each exit hole, where the grommet meets the wire - this is where mast flex does its damage.
- Green or white corrosion at the lower connector block, especially on keel-stepped masts exposed to bilge moisture.
- Any wire moving freely inside the mast rather than secured to the interior; loose wires abrade on rivet heads and sharp edges as the section flexes.
- The masthead coax connection: an open circuit or high-resistance connection is frequently traced to the feed-through connector, not the radio itself.
If the mast wiring is original to a boat over ten years old and the last replacement date is unknown, rewiring before a long passage is the right choice. Running new wiring with the mast standing is a half-day job; doing it with the mast unstepped is significantly faster and better.
Tropical Queensland Factors
Cairns sits at approximately 16.9 degrees south, close enough to the equator that UV intensity is high year-round. The combination of that UV load and the salt-laden tropical humidity of the Far North Queensland coast degrades aluminium anodizing faster than temperate Australian waters do. Anodizing is not paint - it is an electrochemical conversion layer integrated into the aluminium surface, and when it fails, the base metal is directly exposed to galvanic attack and salt air with no protective barrier.
The visual indicators are chalking (a white powder that wipes off the surface), pitting visible as small craters, and loss of the original surface sheen. What those surface signs do not tell you is how much barrier protection actually remains. A mast with localised pitting around fasteners may already have compromised wall thickness at load-bearing points even if the rest of the section looks acceptable.
The practical implication for boats based in or transiting through Cairns is that the three-year professional inspection interval should be treated as a maximum, not a target. Boats that have spent several seasons on the Queensland coast - particularly those left in the water over the wet season - should not assume temperate-climate intervals apply.
Re-anodizing a mast requires full immersion in an acid electrolyte bath large enough to accept the entire spar. A small number of specialist anodizing facilities in Australia maintain tanks large enough for a full-size cruising mast - your rigger can advise on the nearest option and what transport is involved. A mast requiring re-anodizing will in most cases need transport to a specialist facility, which is a significant logistics undertaking. Identify the problem in Cairns with enough lead time to act on it, not the week before departure.
Unstepping the Mast in Cairns: When and Why
An aloft inspection is thorough. A mast-down inspection is more thorough. The decision between them turns on specific factors: the boat's age, its service history, and what the aloft and deck-level work found.
| Situation | Aloft inspection adequate? | Unstep recommended? | Why |
|---|---|---|---|
| Mast under 10 years, recent documented professional inspection | Yes | Only if findings require it | Risk profile is low; aloft work catches active issues |
| Mast 10+ years, no documented professional inspection | Partial | Yes | Industry standard applies tang and bracket replacement at this age; mast-down gives full access |
| Keel-stepped mast with bilge water history | Partial | Yes | Heel corrosion is only fully visible with the mast out and heel casting removed |
| Deck-stepped mast with failed deck boot | Partial | Yes | Internal corrosion from water tracking down the extrusion is invisible from aloft |
| Active galvanic corrosion at spreader root or tang | No | Yes | Full assessment of hidden section loss requires fitting removal, which is easiest mast-down |
| Full wiring rewire planned | Yes for inspection | Preferred for the rewire work | Running new wiring through a standing mast is difficult; mast-down is significantly faster |
Crane bookings at the Cairns marina fill quickly during the pre-season period from July through September, when most boats are preparing for passages north. Book early. A mast-down inspection combined with a haulout gives a surveyor and rigger simultaneous access to the full spar, the heel casting, the deck partner, and the hardware on both ends - far more efficient than staging the work across multiple lifts.
Tom Mynard at Maritime Survey Australia is a naval architect and certified marine surveyor based in Cairns who can produce formal rig inspection reports accepted by Australian marine underwriters. Coordinating the surveyor and rigger for a combined inspection while the mast is down is practical and efficient. The surveyor's written report, the rigger's work record, and any parts replacement receipts together form the documentation package an insurer requires for an offshore endorsement.
If the inspection identifies spar sections needing replacement, Allyacht Spars Australia manufactures and supplies replacement aluminium sections from its Australian facility, with lead times for custom extrusions that can run several weeks. Finding a defect in Cairns with two months before your planned departure is a manageable problem. Finding it the week before you leave is not. The entire point of the inspection is to give yourself time to act.
A positive function test of all masthead navigation lights is required under the ARC technical inspection standard - this benchmark is widely referenced in offshore preparation and is reflected in Australian offshore event requirements. Confirm current specific requirements directly with the organising authority for your event, as inspection standards are reviewed each season.Based on World Cruising Club safety equipment requirements
Frequently Asked Questions
How often should my mast spar be professionally inspected if I'm sailing in Far North Queensland?
The three-year interval applies when nothing unusual has happened to the rig since the last inspection. Several events should trigger an immediate inspection regardless of elapsed time: a lightning strike, even one that left instruments and electronics apparently working; a knockdown past 90 degrees where the mast entered the water; a grounding in which the rig absorbed shock loads through the hull; or purchase of a secondhand boat where you cannot verify the inspection history directly. A boat that has spent one or more wet seasons in the water without being hauled should be treated as due regardless of calendar elapsed time. The interval is a minimum standard for boats with no complicating history - any of these circumstances makes it irrelevant, and the clock restarts from the new inspection date.
What documentation does an offshore insurance endorsement actually require?
Requirements vary by underwriter, but many now specify written evidence of a professional inspection that included aloft work - deck-level checks do not satisfy this requirement. Without the correct documentation, a dismasting claim can be denied. Get a formal written report from a certified marine surveyor or qualified rigger who personally conducted the aloft inspection, and keep it with your ship's papers. Check your specific policy terms before applying for the endorsement, because the underwriter sets what they will accept.
What does unstepping the mast expose that aloft inspection cannot reach?
An aloft inspection covers everything visible on the outside of the standing spar - sheaves, tang fittings, spreader roots, wiring at exit holes, and the masthead. Unstepping the mast exposes the full interior of the extrusion, the heel casting on a keel-stepped rig, the internal face of the deck partner, and every hidden surface behind fittings that must be removed to assess material loss. On a boat over ten years old, or one showing active corrosion signs during the aloft inspection, the mast-down view is the one that actually answers the question.
Can I get my mast re-anodized in Cairns?
Re-anodizing is not the only response to failed anodizing. Where the anodizing has chalked and lost sheen but there is no active pitting, a chemical conversion coating applied by a rigger or marine coating specialist can restore corrosion protection without the spar leaving Cairns. This is a holding measure rather than a permanent fix, and the surface must be clean and free of active oxidation before it qualifies - ask a rigger to assess the surface condition first. Where active pitting is already present at spreader brackets or tang fittings, re-anodizing stabilizes the surface but does not restore lost wall thickness. At that point a surveyor should measure remaining wall thickness at the affected areas before you commit to either transporting the spar to a specialist anodizing facility or replacing the affected section; for an older spar with localized damage, a replacement section can compare favorably on both lead time and total effort.
How do I assess whether my gooseneck pivot pin needs replacing before departure?
The lateral movement test tells you whether replacement is needed, not what to replace. Wear in the pin and bore is a straightforward component job - a qualified rigger can source or machine a pin to the correct diameter and replace the bushing in the bore, typically with the mast standing if parts are available locally. The harder problem is cracking at the weld toes around the casting itself. Structural aluminium marine welds are not repaired by re-welding onsite: the heat-affected zone around the original weld is already the weakest point, and re-welding without controlled post-weld heat treatment does not restore original strength. A casting with visible weld toe cracking requires replacement of the casting, not just the pin. Before ordering a replacement casting, confirm it matches your mast extrusion profile and boom tube diameter - gooseneck castings are not interchangeable across manufacturers, and a mismatched casting transfers load to the wrong section geometry.
How far in advance should I start the spar inspection when preparing in Cairns?
If the window is already short, the inspection still happens - you work to a triage priority. Items in the must-fix-before-departure category are: any movement in tang or spreader bracket fittings, sheave grooves that have cut to a knife edge, a gooseneck pin with measurable slop, masthead navigation lights that fail a function test, and any bare conductor touching the mast wall. These are failure modes that express under load or sustained offshore flex. Items that a rigger or surveyor may judge acceptable to carry with documented monitoring: chalked anodizing with no active pitting, surface rust staining with no corresponding fitting movement, wiring insulation that is stiff but not yet cracked at exit points. That triage call belongs to a rigger or surveyor who has seen the boat - not a decision to make alone on a deadline. If must-fix items surface with insufficient time to address them, the departure date moves. The inspection timeline should be discussed with local riggers, who can advise on current crane availability and parts lead times for your specific situation.